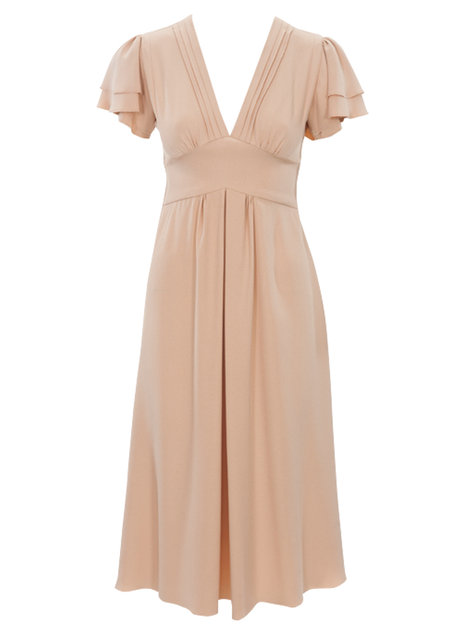
Because it wasn't difficult enough to make the alterations, I set myself up for additional difficulty by using a semi-sheer lawn/swiss dot, which required that I underline the top as well, which I did for the bodice and waistline.

Underlining does have one advantage, and that is that you don't have to use facings of any kind. You can just use the underlining fabric itself to hide raw edges, such as the back neckline:

I also used the underlining to hide the shoulder seam. It's a trick I learned from a HotPatterns top that had you "wrap" the facing around to the right side of the garment, sew the shoulder seam, and then turn everything right side out and tadaaaa...you have a finished edge, hidden shoulder seam, and your facing won't flip around.
Here is how I did it with the underlining. I started by sewing the front neckline edge all the way up to the seam line:

Then I pinned, right sides together, the front and back bodice pieces at the shoulder. I "wrapped" the underlining around the neckline edge, pinning so the back bodice was now in between two layers of the front bodice. I sewed the seam, trimmed the corner, and flip....here is the finished neckline:

I then continued to work somewhat according to the instructions, with some slight changes in construction order to allow for the underlining. After attaching the center front of the bodice, I then sewed on the waistbands. The back waistband was flat, so it was easily attached, but the front band had a center peak. The best way to attach that band is to sew in from each side, towards the peak. Don't try to make a turn at the peak, it will just make it messy. Mark your seams here, it helps.

Do the same in attaching the skirt/peplum.
Once the waistbands were attached, I inserted the sleeves...It is simple to do this while everything is flat, because the sleeves are heavily gathered.
I then added an invisible zipper on one side:

After that, it was quick finishing to sew the other side seam and finish the hems.
Here is the finished top:

And, on the hoof:

The fit is good, considering the acrobatics that I had to perform to finish it. So good, in fact, I am attempting the dress version....


10 comments:
You achieved a great fit on the top. It is very pretty. And the inside looks as neat and professional as the outside. Can't wait to see the dress
Very cute and I love the print.
I love this top and you look so pretty in it! I think your "acrobatics" totally paid off, job well done!
WOW, that is so flattering on you!
Great fit, your alterations really make it the perfect top. Now that you have ti fit, I would love to see you make a dress.
Great summer top. Congrats on the fit - all your work was worth it.
Very pretty top on you - great job!
That is a great top and fit. It makes me want to see if I have that copy.
Ooh I love your top and so glad I found your blog through PR. I don't have Burda magazines unfortunately. That is one fabulous top you have produced.
that top looks great on you and the fit is awesome!
Your fitting acrobatics were well worth the effort, your top looks fantastic.
Post a Comment