Monday, June 29, 2009

Tape Pants 2.0

Last week I wrote about my struggles to create a pants pattern that fits well. After some "investigation," I decided that the crotch curve was completely wrong. So, I completely redrew it and started over in my fitting attempts. Below are some comparative pictures.

Here are some early attempts at pants:


And here is my most recent attempt with the heavily altered back curve:


OK, yes, there are still wrinkles there, but they are DIFFERENT!

Now, instead of a huge wad of fabric under each butt-cheek, I have wrinkles pointing to my hips. THIS I can deal with! This is addressed in PFRP. I think, and someone correct me if I am wrong, that what I need to do is slightly scoop the back crotch curve and add some tissue to the inseam.

I know that it doesn't LOOK very different, but if you look closely that the most recent one, you can see that the wrinkles actually extend up over my butt-cheek, whereas they were all hanging up UNDER the butt-cheek before. Also, I don't have as MUCH fabric pooling on the back of the thighs.

I think that the reason that I was having so much trouble fitting these pants is because I had a myriad of problems going on, beginning with a crotch curve that was completely wrong, and then exacerbated by what is now visible. Now that I can actually SEE what is wrong, rather than just adding, adding, adding to the inseam, I can fix what is wrong.

I also have the front nearly worked out. Here is a pair made from the original pattern:


And here is the most recent pair:


This was fixed by adding some fabric at the side seams and straightening the front curve, not adding tissue to the inseam.

I am ready for one more muslin, and hopefully you will see some REAL progress!

Sunday, June 28, 2009

More Cool Shirts for the Nephews

Lately I have been making some cute bowling-style shirts for my nephews, and I am especially proud of the latest.

I made this shirt for my nephew using Butterick 3475, which is just a plain short-sleeved shirt. I made the contrast strips in the front and the yoke in the back by just drawing a line on the pattern where I wanted the seam to be, and then just tracing the parts separately and adding seam allowances. It is the same way that I made the dragon shirt for my older nephew.

This shirt has kind of a long history. The Three Stooges fabric was initially purchased to make a diaper bag for my brother when my nephew was born (nearly 2 years ago). Then my cat, The Mad Pisser, went on his rampage of death in the dining room and also managed to defile a part of the fabric that had been cut for the diaper bag. I yelled a lot, and threw it away. I then went back to the fabric store to buy more of the fabric, but it was all gone. So, here I was, stuck with a diaper bag with no lid, and unable to get any more fabric.

So, it sat. And it sat. And it sat. Until yesterday. I took apart what was left of the diaper bag and used the fabric to make this shirt for my nephew, the infamous "Fat Baby."

Overall, I am very pleased with the way it turned out. I basically did the same that I have been for the shirts I make for my older nephew, just in a smaller size. Except these are so tiny they feel like making doll clothes!

I started out by putting together the front and back panels. For each I used french seams and then stitched them down, so from the outside it looks like topstitching or a flat-fell seam. I set the sleeves in flat, so I did a french seam there as well. I just pressed the seam towards the sleeve:


I also used black binding on the edges of the fabric, and at the collar. I did not snip the collar and tuck the edge under and handstitch. I decided to do as little handstitching as possible since this shirt is for a rambunctious and filthy little boy, so it will not lead an easy life.


Here is the finished shirt from the front:


And here it is from the back. I also used the stooges fabric on the underside of the collar:


I know that the yoke is rather large, but I wanted to use as much of the stooges fabric as possible.

Since I have started making these shirts for my nephews, I have been contacted by a couple of people to make them for their kids (moms of my nephew's friends, mainly). Since I make these shirts with french seams, binding, and with the contrast insets they are very time consuming. I always explain to people that when I make them for my nephews, it is a "labor of love" so to speak, that it doesn't matter that it is ridiculous to make custom shirts with couture-style finishes for dirty, careless little boys who bring their pants back for patches just weeks after I make them. I also explain that given the amount of time that I expend on each of these shirts, I would have to charge $200.00 apiece to cover the cost of my time. Normally the response is a surprised "Oh! I didn't realize. Never mind then!" But recently I had a reaction that made me call my brothers and tell them to never, ever give my contact information to anyone who asks about those shirts ever again. I got a call from a woman at my nephew's school, asking about the dragon shirt. I gave her my standard response, that they are too time consuming for me to make, and I would have to charge too much blah, blah, blah.

Her response was ridiculous! She got angry! And she told me that I was "completely insane" to think that I could get $200.00 for a child's shirt.

My reply was less than cordial, when I pointed out to her that I did not, in fact, believe that I could get that much money for a child's shirt, and if she would work on her listening skills she would have gleaned from our conversation that that was the reason that I DID NOT make these shirts for sale and, by the way, just how much did she expect to pay for fully custom handmade clothing?

Seriously, I do NOT understand how little people think of other people's time, do they think that I should make shirts that take $15.00 worth of materials and hours of work for $20.00? Go back to WalMart, lady.

The little dude appreciated it, though. Here he is showing me his new shirt:


Here he is showing me how much he loves cookies:


And here he is honking Daddy's nose, Stooges-style:


My mom, grandmother, and niece also stopped by today to see the new floor, and Sadie zeroed in the new sewing machine, and wanted to try it out immediately:


She just sewed lines on scrap for about half an hour...she loves the new machine, and asked if she could make her next project on it. She was even more excited when my grandmother told her that it was EXACTLY the same as the machine that her mother taught her to sew on!

Saturday, June 27, 2009

Singer 99-13

Today I scored quite a prize on Craig's List. I found a Singer 99 in a bentwood case for just $20.00. Not only is the machine very pretty, with nice decals, but it also WORKS! And did I mention, $20.00??

According to this website where you can date your Singer machine, it was manufactured in 1926, Elizabeth New Jersey. I also am pretty sure that is is a 99 based on this site that will assist you in identifying your vintage Singer.

Another good site to check for information about vintage machines is Sew-Classic. Here is a Sew-Classic post about the 99, detailing the machine specs. It is a 3/4 size machine, and the head is made of cast iron. It is belt-driven, and uses low-shank feet and standard needles, although the needle must be inserted with the flat side to the right, so the needle is threaded from left to right.

Here are some photos:


Here is the machine with it's cover on:


Here is a close-up of some of the nice decals:


It looked so good, I threaded it up and tried to sew. Thanks to the Sew-Classic site I was able to download a manual and followed the threading diagram. It works great!

Obsessing Over the Tape Pants

I continue to be obsessed with my hunt for perfectly fitted pants. I have sewn so many pairs of pants I actually exhausted my stash. Yes, I know that that is hard to believe. But I had to go back to the fabric store for some more twill.

I have purchased Pants for Real People, and remain frustrated with my baggy hind end. I will say, though, that thanks to PFRP I was able to identify the smiles at the front crotch as "false smiles" that did not need an extension of the crotch curve, but some additional tissue at the hip.

But, as Rachelle at Smoking Needles pointed out, PFRP don't really address fit issues for the combination of relatively flat stomach/small waist/junk in the trunk. Which is frustrating, because I know a lot of people who struggle the same way that I do with pants. Seriously, for YEARS I just wore men's jeans as "low-riders" because there was no way I could find women's jeans to fit. Fortunately, some stores like Ann Taylor, Ann Taylor Loft, and Banana Republic have added a "curvy" fit to their lines, and these fit better.

But why can't I get a pattern to fit properly? I can get the front flat, I can get the back rise right to cover my bum, the side seams lie perfectly vertically, yet I STILL have that lump of extra fabric just under the tush.

So, I busted out some assistance from the kitchen. I wanted to find out what my actual crotch curve was, since that is the issue that I can't fix. I took a long length of aluminum foil and wadded it up to make a strip that would hold it's shape. Then I molded it to my crotch curve. Thank god I was home alone, because J would have really wondered what I was up to.

This is what I got:


So I traced that off onto a piece of newsprint:


Here you can see the front curve is actually pretty close:


But that back curve, oh my!


Here you can see the changes that I made to the pattern. The red line is the tracing of the original pattern, and the black is what I changed to accommodate the tracing of my crotch curve.

I only made slight changes to the front:


But the back, what a mess:


I took out some additional at the top back to make a better curve over the bottom, but I also added a significant amount of height to the inseam. Because of this additional length to the inseam, I took a wedge out of the leg....since otherwise the back inseam would be about 2 inches longer than the front inseam. To do this, I just slashed the pattern, overlapped, and taped:


I am ready to make another version, and have this pattern cut out from some khaki twill. I will report back on my anticipated spectacular success....or not.

Friday, June 26, 2009

All Finished!

Yes, I know that this is two blogs in one day, but it is finished!!

We have gone from this:


To this:


In just two days!! The floor turned out fantastic:


And it matches the table and chairs perfectly:


It also matches the box beams in the ceiling that inspired the entire project:


And, by removing the carpet and original floor myself, I saved about $2000.00 in labor costs. Way to go, me!

Maybe one of these days I'll even put up a post about finishing the table and chairs....but that's for another day....

Progress!!

So we are currently in day 2 of the installation of the floor, and i am LOVING how the almost-black floor looks in that room. Except now I want to repaint. And I want new curtains. And to reupholster the chairs....because come ON, wouldn't that floor look great with a merlot wall?


And yes, I can see why we hired professionals for this. They have nailguns!!


They appear to have a few spares, do you think they would miss one?


Oh, and....


Flush vents stained to match. Pretty cool, eh? As I explained to J (who balked when he saw the cost of the vents on the invoice), when you do the tear-out yourself, you can afford the nice details!!

Not to mention, the owner of the company is super-nice, and although he doesn't personally do floor refinishing, he does teach it, and walked me through the ENTIRE process of refinishing the rest of the floors in the house. He also said that saving the salvageable floor from the dining room was very smart, and that will make refinishing much, much easier.

Now I no longer need a nailgun. But I will definitely be needing a sander! A big one!

And I can HIGHLY recommend Motto's if you need flooring installed in St. Louis. They are professional, well-priced, knowledgeable, and incredibly friendly and helpful.

Wednesday, June 24, 2009

Destruction Complete, Ready for Reconstruction, and What Other Mischief I Have Gotten Into

Last week we got the last of the work done on actually tearing apart the dining room, and now have the floorin in the house and ready for installation to begin tomorrow. I am so excited! We have actually hired a professional to do the installation, but that is ONLY because J. said I can't have a nailgun. I suspect he knows EXACTLY what kind of mischief I could get into with any tool with "gun" in the name.

But, we did save a SIGNIFICANT amount of money on labor by doing the tear-out ourselves. Here is the room, cleaned up, nails pulled, and the flooring "acclimating" to our house. We picked it up last Wednesday, and saved again because I bugged my cousin with the giant truck to come help me get the wood, so we didn't have to pay for delivery, either! He certainly didn't know what he was getting into, since my car died at the flooring place and he ended up having to jump it and then spent a half hour at my house crawling around under the hood of the car, just to pronounce the battery "shot." So J. got to take it to the dealership the next day for repairs.

Here is the flooring, ready to be installed. Yes, we did use a shovel to clean up all the crap:


And here is the original floor, all cleaned up, nails pulled, and all the debris removed:


Also, in the last week I spent an embarassingly huge amount of time making a felt cow. Yes, a felt cow. Let me explain....

One of the girls that I work with recently had a baby and she has been "pumping" in her office. So that no one just barges in (since we all have keys to each other's offices), she puts a post-it on her doorknob that says "do not disturb."

One day, I was walking down that hall and stopped to talk to another lady that works in our office. I pointed at the post-it and kind of laughed. My colleague that I was talking to snickered and said "It's not like we don't know what she's doing in there." So I replied "Maybe she should hang a bottle on her door." To which my colleague (who does have children, and also nursed) smiles and says "Yeah, or a cow."

At this point, we laugh hysterically and I go back to my office. About 10 minutes later, my colleague with the new baby comes into my office and says "Moooo!!!! Moooo!!!!! It's not like I can't HEAR you people!!" And more hysterical laughter ensues.

So, two of the other girls that I work with and I decided that what our friend needed was a do-not-disturb cow. My plan was to make it look like the cows from the Chick-Fil-A commercial, the ones that stand there holding the sign that says "Eat More Chicken?" Except this one would have a sign that said "Do Not Disturb."

Well, guess what? I'm not that artistic. So this is what I ended up with:


Yes, that is a giant, obscene udder hanging off the bottom of it. I snuck it onto her office door before she got in, and then made myself scarce. When I got back from my meeting the consensus was, it was hilarious, but there would be revenge in my future, so be prepared! Fortunately, everyone that we work with are really good friends, and also have a great (if a little "off") sense of humor.

This week, I also decided that I would get serious about Weight Watchers, and try to get rid of this fluff that I put on when I had to take steroids for the Hidradenitis. So, Monday night I spent a recockulous sum of money at the grocery store, and yesterday and today I have been a cooking fiend. I made my own microwave meals, and now have a refrigerator and freezer stocked with "grab-and-go" meals, all 8 points or under, and (this is the good part!) J will eat them, too. Now that he has decided that he likes chicken.

Here is what I made so far this week:

Chicken and portabella pizza with white sauce and whole wheat crust. 1/4 of the pizza is only 5 points!


Vegetarian lasagne, made with eggplant, leeks, fresh basil, and chopped tomatoes. Only 5 points a serving!
After J. and I had lasagne for dinner tonight, that still left 4 servings for "meals-to-go" for the freezer:


I also made a layered mexican chicken casserole, with black beans and chiles, which worked out to 6 points a serving:


And finally, a grilled pork tenderloin with nectarine salsa, for just 4 points a serving!


Now I have 15 ready-made meals in the freezer, and for a whole lot less than buying Lean Cuisines!

So, now you know why I haven't sewn anything lately!!

Monday, June 22, 2009

More Sewing Lessons

So my niece Sadie's sewing lessons have continued, and she keeps improving. It also seems that her tastes are changing. When we first started sewing, she did NOT want to make skirts or dresses...no way, no how! But as we have progressed she has expressed a lot more interest in dressier clothes and made herself a gray skirt this weekend, and now wants to make a black one as well.

She has also discovered the Burda World of Fashion magazines and has been itching to try some of the patterns in there. Since I had already made the a-line skirt from the April issue, I figured I would be able to talk her through the construction, without inflicting the BWOF instructions on a fresh beginner.

I ended up putting together the front yoke for her, so that she could just put it together as six panels rather than struggling with the overlapping yoke pieces, the buttonholes, and the topstitching.

She did a very good job in assembling the rest, even installed her own invisible zipper. She is very steady-handed, her seams are even, and her hems are very smooth and straight. Here she is as proud as can be in her new skirt:


I think that in our next lessons we may start talking about some alterations, because you can see in this picture that she has a little wrinkle below her waist that could probably be rectified by a small swayback adjustment:


But then again, it might have nothing to do with needing an adjustment and everything to do with her tendency to want to sling the waist of anything she is wearing down under her belly. Kids are such slaves to fashion, and the low-waist ANYTHING is still in style, so she wants to push everything down on her hips. The problem is, is that she is long-waisted and has a little bit of a pot belly. She doesn't have a weight problem, just a little puppy fat that I'm sure she'll drop as she becomes a teenager. But, because of that little belly, she just looks plain silly when she pushes the waistband of her pants.

I think the next time she is here I will slap together a couple of pants muslins for her if that wrinkle is still there or it really is just her tugging at the waistband. Or skirts....now that she wants to sew those!

I don't have much to report on my own sewing. I haven't been doing much other than continuing to work on alterations to my "tape pants." I added a fish-eye dart to the pattern to get rid of my saggy bottom, and after spending some time with Pants for Real People have become convinced that the smiles that I have at the crotch can't be rectified by extending the crotch curve (that just makes it worse), but that they are "false smiles" and need some additional fabric at the side seam instead. I also need to continue to work on the back curve, while the fish-eye dart has removed some of the extra fabric there, I need to make that dart larger to get rid of some more.

Monday, June 15, 2009

Ideas from Unlikely Sources

One of the things that I have always given relatively short shrift to in my sewing equipment is seating. I tend to perch on just about anything, and really paid it no mind because I am up and down so much to iron, I thought that what I was sitting on didn't really have much impact on me or my sewing.

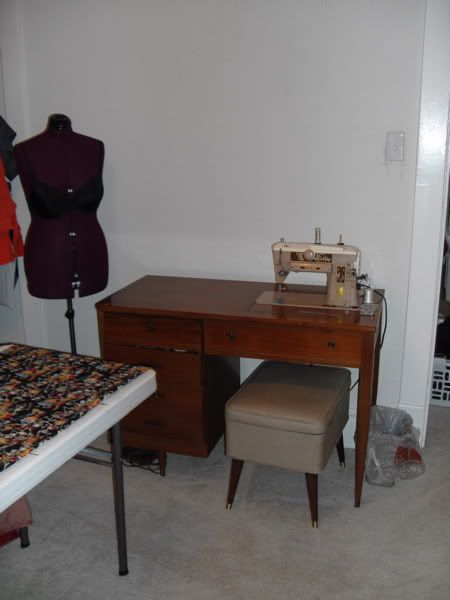
That is one of the reasons that I was happily using the bench that came along with my 401 when I purchased it:


For one, it was the proper height to fit under the desk and still operate the knee control. On the other hand, it was as hard as a rock and had no back support.

Last year, after getting a little bit too obsessed with sewing, I noticed that my back was beginning to hurt on occasion. I assumed that it was my choice in seating, and decided to change my seating in the sewing room.

I tried standard office-type chairs, but even on their lowest setting were too tall to fit under the desk properly and still operate the knee control. I tried folding chairs, but they were too wide to pull up under the desk. Really, pretty much every chair in the house was in the sewing room at one time or another. But nothing really worked all that well or made sewing more comfortable.

Until....my husband asked me what I was up to with all the chairs in the sewing room and I explained to him that my sewing stool was making my back hurt.

My husband is a professional jazz musician, and many of his explanations of ANYTHING are tied to his experience as a musician. He pointed out that when I sat at the sewing machine, I sat like a drummer. Feet planted, leaning forward slightly, and low to the ground. So what I needed was a "drum throne." (He also pointed out that sometimes I stick my tongue out when I am concentrating really hard, just like his friend Joe, a drummer. But that was just pure meanness and immaterial to my search for proper seating!!)

While I liked the idea of my needing a throne, I had no clue what a "drum throne" was, or what it looked like. Here it is:


My husband got me a Roc-n-Soc and I have to say that it is EXACTLY what I needed. It sits low enough to the ground that I can operate the knee lever without feeling crowded. Because the seat spins, I can push the knee lever by just turning the seat slightly. It is well-padded, so it is comfortable to sit in. And, the seat is compact enough that it fits under the desk without forcing me to sit off-center from the machine needle. The best addition of all is the back support that my little stool did not have.

I know that lots of you also struggle with good seating in the sewing room, and with the many hours we spend in front of our machines, the last thing that we want is to settle for something that may or may not be the most comfortable, or the best for backs and shoulders. That is why I thought I would like to share my discovery (well, my husband's discovery).

So, if you are looking for good, comfortable seating in your sewing space, pop into your local music store and ask to take a look at their drum thrones!

Saturday, June 13, 2009

Destruction Phase 2: Complete!

Today my brother and I removed the wood floor in the dining room. And boy, if I ever see the contractors that renovated this house...I'm going to punch them right. in. the. neck. Seriously! The patches in the floor? Were put in using liquid nails. And! There were a few places where no matter how hard I tried, I could not pull up the boards without splintering them. Why? Because they were nailed down with DECK NAILS! Nice move, idiots.

Like a cake, the first piece is the hardest to get out. So, I decided that the first piece to come out would be the patches, and I would work out from there. Here you can see the first stages of removal:


I started out by using the claw end of a hammer to pry up the boards, but a much better tool arrived with my brother, a rolling head pry bar. A standard pry bar was to thick to slide under the boards. But the rolling head bar, with a giant screwdriver to lift the edge of the board, worked great:


I worked on the floor for about an hour and a half before Ricky got there, and we had the whole floor up, and the area cleaned up in just 4 hours:


We only had two casualties:


Yeah, the top one is me. I scraped myself with a nail tossing broken boards out the window. Yes, we are lazy bastards and threw the trash boards out the window. I mean, come ON, that is where the garbage cans sit, so why not? It did earn me some interesting looks from the neighbor as a rain of broken plywood, tackstrip, and flooring slats came flying out of the bay window.

Those boards that were salvageable went into the basement for storage, so they can be used to repair other floors in the house:


The last step is to sweep, pull the nails left behind in the subfloor, and running over everything with a shop vac. Since I am EXHAUSTED right now, and every muscle in my body feels like a little fist, the nails can wait until tomorrow. Or even Monday when J gets back from visiting his brother in Chicago.

Hmmmm....think I should have mentioned to him that I was doing this while he was gone?