Saturday, February 27, 2010

Frankenpatterning

I have been finding that since I have been sewing, I have become much more particular about how clothing LOOKS. I used to be much more accepting of things that were "close enough." Now I am much more aware of what the proper styles for my body shape are, what I am most comfortable wearing, and I have been much less patient with patterns lately that have some, but not all, of the traits that I am looking for.

For example, one of my favorite shirts that I have made recently is Burda 05-2009-110. The front, with the sewn-down pleats, is very flattering:


Here is the line drawing:

The shirt has an empire line that I had to lower by two inches in the original, and I also had to add some extra room in the biceps. Over all, the alterations were easy and I was fairly happy with the way the shirt turned out:


There were two issues that kept the shirt from being a "home run." The shirt has a nice shape, but the back also has pleats, and I find that those pleats just bulge out over my rear end, not a very flattering look! I also did not like the sleeves, as they were difficult to ease, and were a bit to short and narrow for my preferences.


So, I decided that I would alter the back to have darts instead of pleats. To do this, I traced a new version of the back, with the center pleats folded out, and then drew in darts using Butterick 4609 for the size, length, and placement:


I also decided that I wanted to change the sleeves and armscye. Recently, I made Burda 01-2010-133, a peasant shirt with front bib:


The sleeves were perfect, no working out excess ease, and the length and size around the bicep was idea. So I decided that I wanted to use those sleeves. To do this, I also had to change the armscye, so I laid the 01-2010-133 pattern over the armscye of my new tracing for 05-2009-110 and retraced it.

Here is my final "Frankenpattern," made in an embroidered black lawn (that picks up every bit of lint in the house!):


I know, you can never see the details on black clothes. So here are some lightened images:


You can see the alternating lines of embroidery in the above photo. Here you can see the altered back, with the pleats replaced by two long darts:


And the perfectly eased sleeve:


I am going to start tracing this sleeve cap and armscye onto every pattern I make, it went in so nicely!

And finally, from the side, you can see no pouf about the bum! (Although my multiple chins are clearly visible):


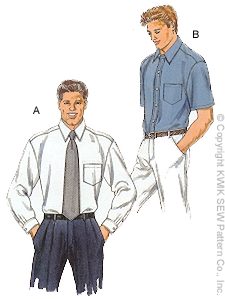
All in all, I am very happy with this version of the shirt, and think that this will definitely become the basis for many shirts in the future. One of my next projects is to redraft the pattern for the bib shirt (blue plaid) to add sewn-down darts on the front, and add the darted back, rather than the pleated back. But, before I do that, on the cutting table is a shirt for my husband Kwik Sew 2777. I will keep you updated on my progress!

Sunday, February 21, 2010

A Productive Weekend


I have been "auditioning" patterns for my Liberty Lawn purchased in Portland last year, and to that end today I finished BurdaStyle 01-2010-133, a bib-front tunic with pleats in the front and back. In the Burda version they actually used a Liberty, so I thought that this would be a good one to try. For my muslin, I decided to use a cotton shirting that I purchased from Fabric.com for $1.95 a yard (can you tell I love their sales?).


I purchased two lengths, one in blue and black and one in shades of green. I decided that I would use the blue for my shirt, and the green I set aside to make a shirt for my husband.

Before embarking on making a giant blue plaid shirt, I decided that I would do a little "snoop-shopping" to make sure that I wasn't completely out of line with current trends. Given that I had been seeing plaid EVERYWHERE in the stores, I figured I would be pretty safe, but wanted to make sure. Here are some of what I found, looking for both plaid, as well as bib-front shirts:

Plaid shell from Talbot's, $79.50:


Pullover plaid shirt from The Gap, $54.50:


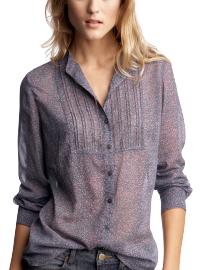
Bib-front shirt from The Gap, 54.50:


Sandra Ingrish ruffled plaid blouse, 68.00, from Nordstrom:


Plaid tunic from Nordstrom, Originally 78.00, on sale for 58.90:


Given these examples, I embarked on my project. On Saturday night I traced the pattern and cut it out. Based on my measurements, I traced a 46 at the top, and transitioned to a 48 at the hips. There is so much ease in this shirt, I could have stayed with a 46. I also made some minor changes in that I did not use the piping around the bib and collar, and also left off the little loop that they have extending below the button placket:

Here is the finished product, somewhat more casual in style than the original:


The shape is nice from the front, the pleats lie flat and the sides are shaped nicely, but the back also has pleats below the yoke and it causes the back of the shirt to "poof":


I don't really appreciate a giant poof on my back, since my rear-end doesn't need any accentuating. Although I should have realized that it would do that, since another BurdaStyle top that I made last year does the exact. same. thing:


Which brings me to my next question...what is it with Burda and the pleats in the back? Are they averse to a couple of nice darts for shaping? If I make this top again, I may redraft the back to have darts, and no yoke.

For the buttons, I had some silver buttons with glass cabochons that look like westernwear buttons:


The sleeves have a nice cuff and pleats as well:


Overall, I am rather pleased with how the shirt came out. It will make a nice top with any of the plethora of black pants in my closet. Which I made another pair of this weekend. I sewed a second version of the pants from the December Burda with all the wild seams:

No photos, since nothing ever shows up on black pants anyway! But, I repaired the problems with the gaping pockets by just eliminating them.

And finally, I just wanted to include the following photo:


A friend of mine asked me how did I set sleeves when none of my vintage machines had a free-arm. I told her "I sew inside the circle" which earned me a confused look. Since it is easier to show than explain, here you can see what "sewing inside the circle" is. I have gotten so used to setting sleeves like this, when I do use a machine with a free arm, I still sew them this way!

Wednesday, February 17, 2010

Completed: Vogue 1127 Suit

Vogue 1127, the Badgley Mischka suit, is finished! I have been so busy that I have hardly been able to find time to work on it. Not to mention, I have been a TERRIBLE blog friend and not reading and leaving comments. I hope that this week I will be able to catch up on all my blog reading, but in the meantime I wanted to get some photos taken of the suit.

While this was not a difficult suit to make...in fact, the construction was quite simple...I found it very tedious to make three separate pieces of the same outfit. I don't think that my attention span is long enough to sucessfully make ensembes. I am more of a "one off" kind of person. But, let's get on to the review of the outfit.

For the suit, I used the cobalt boucle that I got from Fabric.com when they put the Vera Wang fabrics on sale for $1.95 a yard. I purchased 5 yards, and still have half of it. The suit did not take very much fabric. I also purchased a yellow/fuscia thai silk for the shell, and a lining in yellow:


Let's start with the jacket, which has already been reviewed on this blog. The jacket is a raglan sleeved jacket with a very wide, stand-up collar:


It also is cropped, which is hard to see in the line drawing or in the model photo, since she is slouching forward in all of the images:


The issues that I faced with the jacket were as follows:
  • The sleeves were very wide, and long. I had to put a very deep hem into them.
  • The jacket was also unlined except for the sleeves, which I found odd for a designer pattern. I drafted a lining for the entire jacket.
  • The jacket is very short, which is not a problem, but it is not immediately apparent from the images on the pattern. Since I also have not sewn many raglan sleeves (in which the bodice pieces are very short anyway), it also did not occur to me until after I had it cut out. I put a very small hem in to lengthen it.
  • I wasn't able to use my mechanical buttonholer on the jacket because the fabric was too thick for the attachment to move it. I also am completely incapable of handsewing neatly, so there was no chance that I was going to be able to handsew the buttonholes, so I used giant snaps instead and just sewed the buttons (that I paid more for than the fabric) to the outside of the jacket.
  • I had to use a really heavy interfacing in the collar, because otherwise it would not stand up the way that it was illustated, my boucle was just too floppy.
Here is the finished product:

And the snaps:

And the yellow lining:


The second piece that I completed was the skirt. It is a very simple pattern, just two pieces and a facing. It sits slightly below the waist, as illustrated in the line drawing:


I had already made the skirt once, in a sage and black herringbone:


From the "test-run" I found that there were a number of changes that I wanted to make. First, I wanted to lengthen it, as I found it to be exceptionally short. I also found that the size 20 that I cut, while it matched my measurments, had too much ease. So, I made the second version in an 18, and then tapered in at the waist, and also pegged the bottom more. I also lengthened it by 3 inches. Here is the finished product:

Making the skirt with the boucle also reavealed one other change that I needed to make. Because the boucle is so thick, I had to stitch down the seam allowances to make them lie flat. Otherwise they wadded up and made little lumps on my hips. I used the same yellow lining in the skirt that I did in the jacket.

Finally, the shirt. The shirt is a simple pull-over shell, with mock turtleneck and buttons at the back of the collar. Here is the line drawing:


And the pattern image:


I made the shirt from a silk that was woven with pink threads in one direction and yellow in the other. I also washed the silk which made it much drapier than it was originally, but also cut some of the sheen. I found some apricot-colored pearl buttons for the back of the neck:


For the shirt, I did not follow the instructions at all. I left off the tie at the neck, and rather than facing the armholes, I bound them instead. I also finished the shirt using french seams. I also tapered the shirt at the waist, since it is pretty much a shapeless sack.


Here is the finished shirt. I followed the instructions for gathering the neck, but I have to say that I am not happy with how it looks. It is not gathering like it should, there is just too much fabric there. Perhaps my fabric is heavier than what was initially intended. I may redo it with an ungathered mock neck:


Here is the whole outfit, ready to go to work:


I prefer the top of the jacket open, otherwise the top doesn't show at all under the jacket:


I will probably wear the suit a couple of times before deciding what to do with the collar, perhaps I will like it better after I see it in action!

Edited to add, the weather has been too rotten here to actually wear the suit to work, but since Fridays are casual, I decided to break out the jacket today:


Fortunately, there are so many colors in the boucle that it matches just about anything.

Wednesday, February 10, 2010

Wow, Really? A Year?

Sunday is my first anniversary, and I can hardly believe that it has been a year!


Yes, we had a ridiculously large wedding party. That's what happens when you have your first wedding in your mid-thirties. You have had decades to make friends, and it is impossible to narrow them down!


The bridesmaids were good sports, and willing to shiver in the cold:


The boys were huddling in the bus (no limo for us, we had to have a whole bus!!). At least the ladies were up to just about anything the photographers wanted to do:


Since we got married in February, we decided to have a Mardi Gras theme, complete with Dixieland band:


This is what happens when you give bridesmaids unlimited access to the hurricanes:


This Sunday we will be celebrating by thawing out the top layer of the cake and having my family over to help us eat it. I hope that everyone has a Happy Valentines Day, or a fantastic Mardi Gras, whichever you decide to celebrate...or celebrate both!